5 minutes read
How to Build Your Customer Support Chatbot with API.AI in Simple StepsTable of Contents
As an Engineering Manager of Digicorp, I am responsible for improving overall engineering processes of product design and development. I am also responsible for building quick prototypes to upsell our new offerings.
Recently, we have been working on products like mobile assistant for expecting mothers, mobile app for parents of autistic child, web portal for educating teenage girls and a career guidance portal. All of these solutions are content-rich. Information Architecture plays a vital role in such content-rich apps and it is one of our strong areas but we still feel that, there will be a large number of users curious to get quick answers on specific questions. To achieve that, we came up with an idea of implementing Chatbot along with existing offerings.
The goal was to build a quick prototype and demonstrate existing clients how chatbot can solve above and other online support problems.
We quickly built chatbot for
- Facebook Messenger
- Website
- iOS Application
- Android Application
We used Api.ai for the same and here are the simple steps for you to follow.
Building Facebook Messenger Chatbot
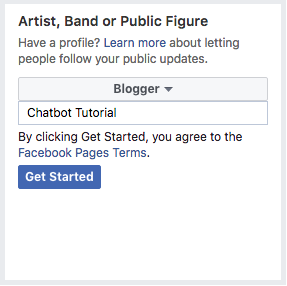
- Login to your Facebook account and create a Facebook page of your choice
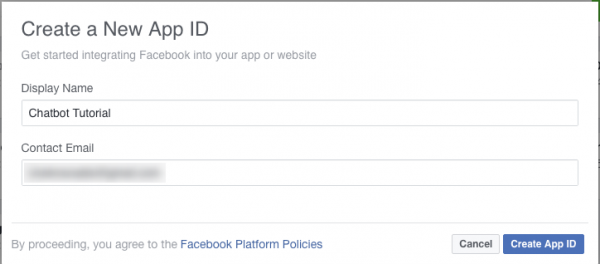
- Open Facebook apps developer console and click on Add New App. Give valid name of the application and click on Create App ID
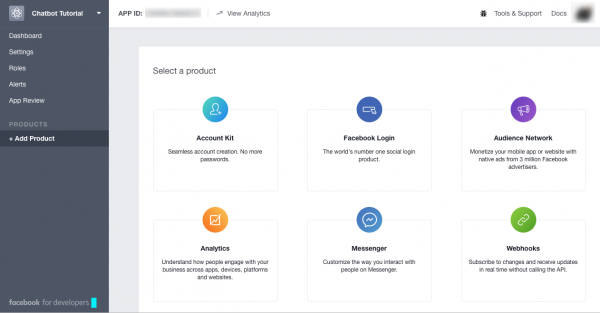
- Once the application is created, you will be redirected to Facebook app dashboard. Select Add Product and it will show you different products for which a facebook app can be created. Select Messenger and click on Setup
- Now go to messenger’s Setting and generate a token for your Facebook page. You will be able to see list of Facebook pages that you have in your account. Select a page and it will generate token for that page. Keep this token for future use.

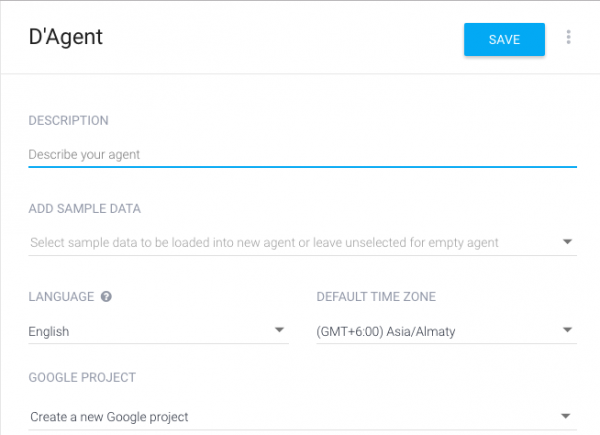
- Now it is a time to connect Facebook messenger with automated response engine. We are going to use api.ai for the same. Open api.ai in a new tab, go to console and create a new agent. Leave everything blank except name of the agent and save it.
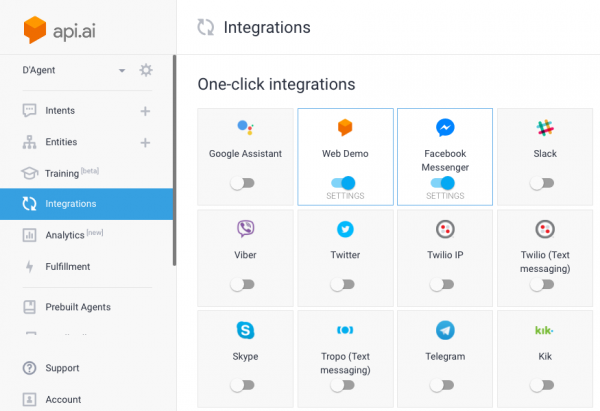
- api.ai provides list of integrations. We are going to use their Facebook messenger integration. Go to Integrations and select Facebook messenger
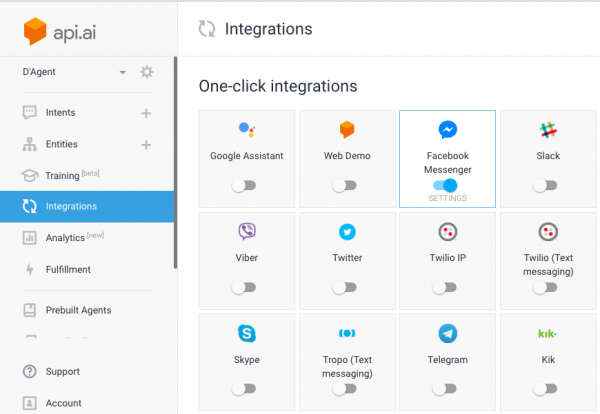
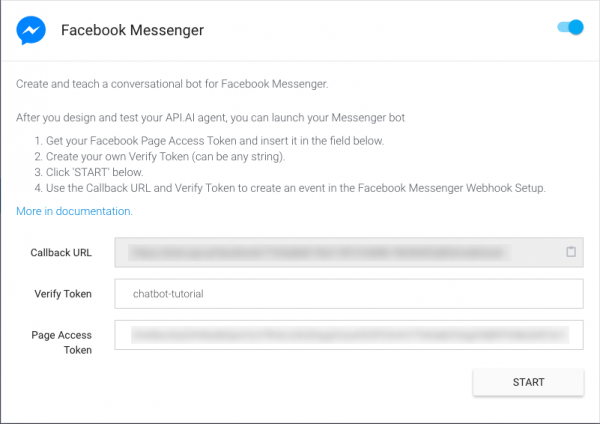
- Once you enable Facebook messenger integration, you need to do following changes.
- Copy Callback URL and keep it with you for future use.
- Enter verification token. It is manual entry. Choose any alphanumeric value.
- Paste the Facebook page token that we have from Step 4.
- Click on Start. It will start the bot engine on api.ai.
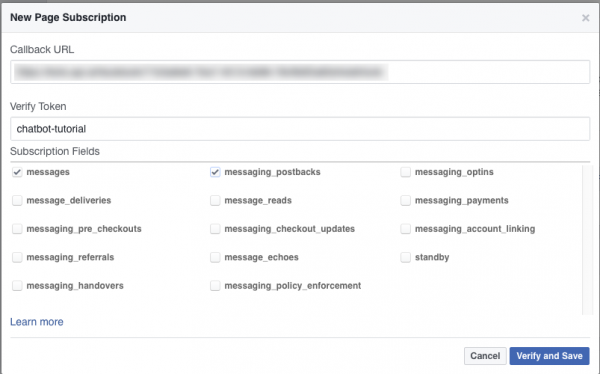
- Go to Facebook app of step 4 and click on Setup Webhooks. You need to do following changes,
- Paste callback URL that we have copied in Step 7
- Enter the same verification token that you used in Step 7
- Select subscription fields. messages and Messaging_postbacks are two subscription should be selected for facebook messenger chat bot
- Click on Verify and Save
- Once Webhooks Setup is complete, you need to setup subscription of particular web page. Check below webhooks setup, select page and click on Subscribe. You are done with all the configuration that established a handshake mechanism between automated response engine api.ai and your Facebook page. Now need to feed the data to api.ai.

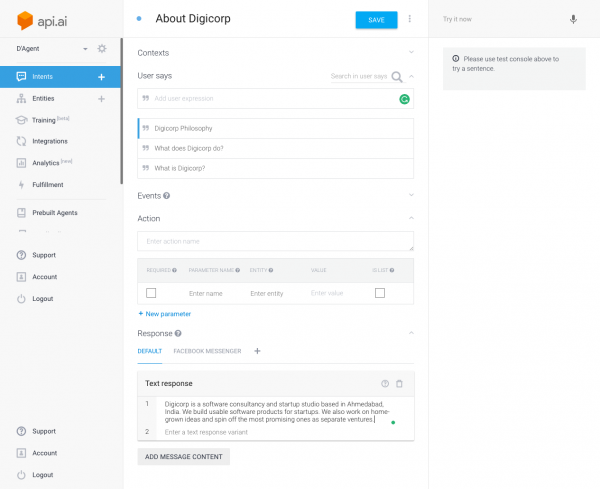
- Go to api.ai console and select an agent that is connected with Facebook page. Click on Intent and Create Intent. You can write possible combination of questions under User Says and possible response and Save it. You can learn more about intents, events, actions and different type of responses on api.ai documentation.
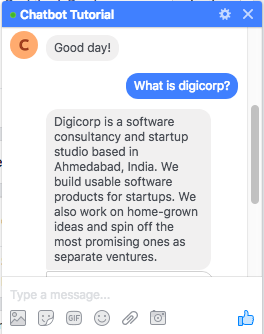
- You are almost there! Go to Facebook web/mobile messenger and search for chatboat that you have created. And start typing. It will start replying as per the responses from api.ai engine. So far only admin can use this chatbot. Once application is submitted to Facebook for review process and after it gets approved, it will be accessible in public. You can learn more about the review process from here
Building Chatbot for Web
- Go to api.ai and select the Web App integration from list and enable it.
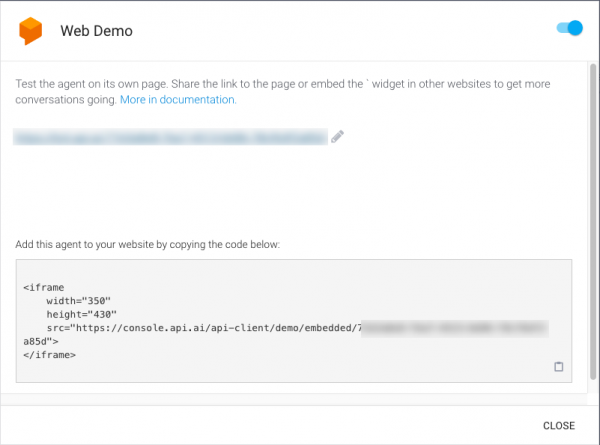
- Click on Web Demo integration and copy iFrame code
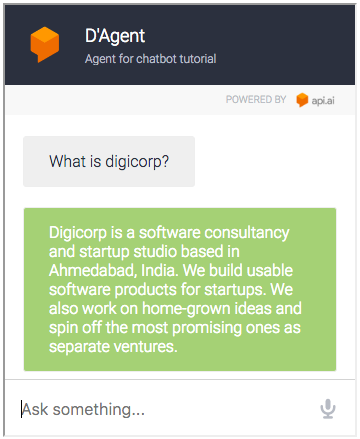
- Paste that iFrame code on web page and it will show the web client on web.
Building Chatbot for iPhone
- Go to api.ai. Open agent setting and copy client access token
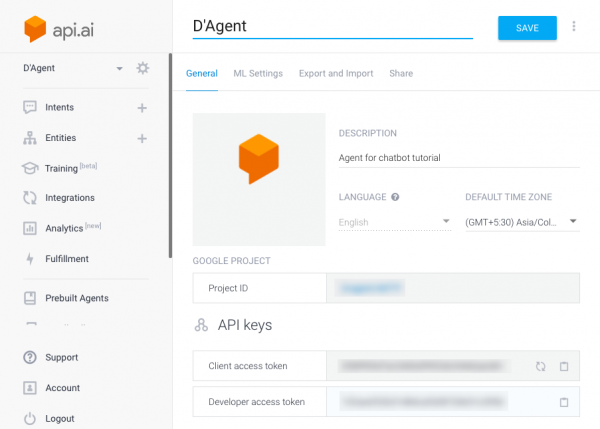
- Clone iOS api.ai client from github.
- Run ‘pod update’ in the ApiAiDemo project folder.
- Open ApiAIDemo.xworkspace in Xcode.
- In viewDidLoad method of ViewController, replace copied token from step 1 to YOUR_CLIENT_TOKEN
- It’s done. Run the application.
- The provided library has a very basic version of showing responses. You can always enhance to real chat application along with nice UI and branding.
Building Chatbot for Android
- Go to api.ai. Open agent settings and copy client access token.
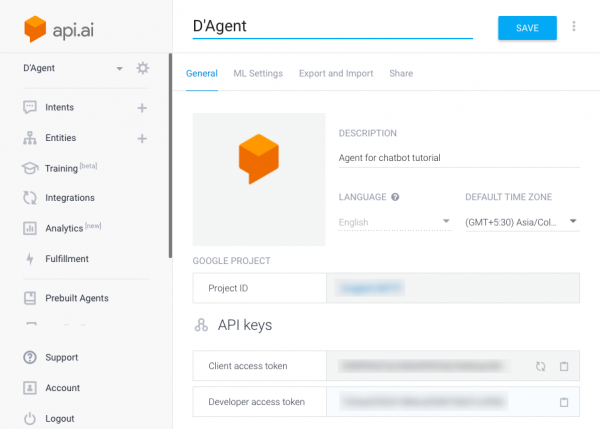
- Clone Android api.ai client from github.
- Open Android Studio.
- Import the api-ai-android-master directory.
- In the Project browser, open apiAISampleApp/src/main/java/ai.api.sample/Config.
- Replace ACCESS_TOKEN with copied token from step 1.
- It’s done. Run the application.
I hope these simple steps will help you build quick chatbot prototypes for you and your clients. Do share your thoughts after you bring them in production.
Vivek Navadia
- Posted on November 28, 2017


