Implementing Serverless Architecture – A Step-by-Step Guide
Table of Contents
Introduction
As discussed in our previous blog – “Serverless Architecture: A better way to manage cloud and workloads for large-scale products”, implementing serverless architecture enabled Jetpacked.org better scalability and efficient workload management.
To address the limitations of EC2-based instances, adopting a serverless architecture implied leveraging Docker, AWS ECR, and AWS ECS. This approach in-turn allowed us to overcome the constraints of the previous system and effectively implement multi-tenancy in our application.
How we implemented Serverless Architecture?
Following are the high-level steps that we followed to implement serverless architecture:
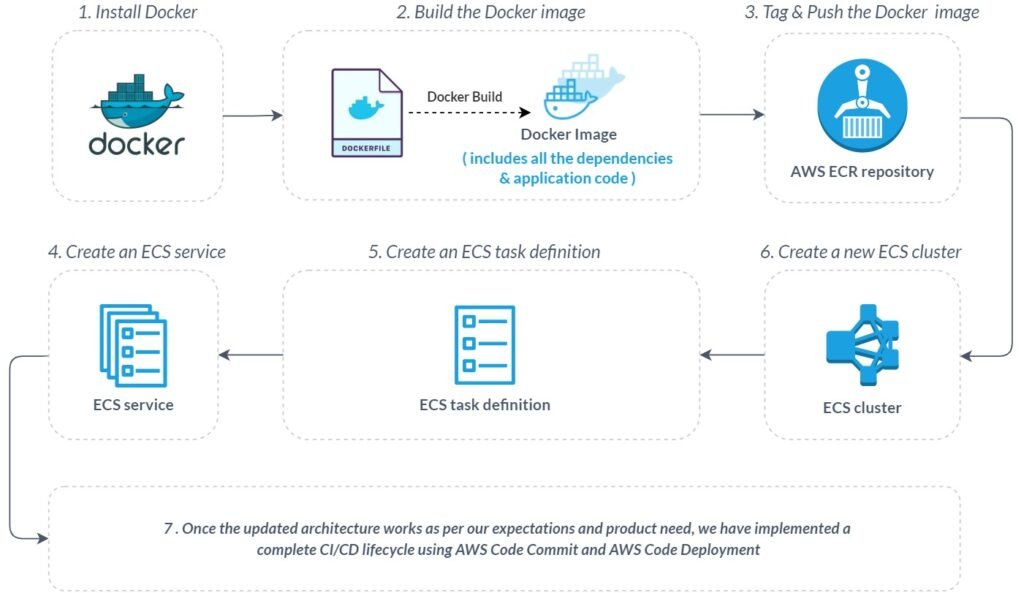
Step 1
Install DInstalled Docker on the machine and created a Dockerfile that defined the configuration for the Docker image. The Dockerfile specified the base image, any additional packages or dependencies, and the application code that needed to be included in the image.
Step 2
Built the Docker image using the Dockerfile and the Docker build command. This command created a new Docker image that included all the dependencies and application code.
Step 3
Tagged the Docker image with the repository URL of your AWS ECR repository. This was done using the docker tag command, where you specified the image name, the repository URL, and the version tag.
Step 4
Push the Docker image to your ECR repository using the docker push command and specify the Pushed the Docker image to your ECR repository using the docker push command, where you specified the repository URL and the version tag.
Step 5
Created a new ECS cluster for development, staging, and production environment using the AWS Management Console. This cluster was a logical group of EC2 instances that could be used to execute Docker containers.
Step 6
Create an ECS task definition that specifies the Docker image to be executed, any environment variables, and any otCreated an ECS task definition that specified the Docker image to be executed, any environment variables, and any other configuration details. The task definition was created using the AWS Management Console or the AWS CLI.
Step 7
Created an ECS service that specified the task definition to be executed, the number of tasks to be launched, and any other configuration details. The service was created using the AWS Management Console or the AWS CLI.
Step 8
Once the updated architecture was working as per our expectations and product need, we implemented a complete CI/CD lifecycle using AWS CodeCommit, and AWS CodeDeployment. Here we have used AWS ECS as the deployment location instead of EC2 instances.
Vivek Navadia
- Posted on June 15, 2023
Table of Contents